3Dworks


Project maintained by benwarnerDigitalArts Hosted on GitHub Pages — Theme by mattgraham

Digital Production Arts

DPA 8070 3D Modeling and Animation with Jim Sidletsky

By: Benjamin B. Warner

Back to the main page

Final Project: Pipeline Trials - Taking a “Weredog” From Zbrush to Animation

Date: Decemeber 9th, 2020

Download the wereDog maya file!

Objective:

Choose a focus: advanced modeling, advanced texturing/shading/lighting/rendering, advanced animation, advanced rigging, or e?ects. Your project needs to either explore a topic we did not tackle in a class project or go beyond what we did in a previous project. You can use any of our previous models (or ?nd other assets but always cite your sources). Your ?nal movie should be saved in standard format (e.g., .mov), minimum size 800x600 but 1024x768 is preferred.

Solution:

For my project, I focused on advanced modeling by way of importing one of my past Zbrush projects into Maya, and then I also wanted to make an advanced rig to control it. Finally, I made an interesting animation to demonstrate some of the capabilities of the rig. Shading and lighting are relatively basic in this example, but the shading for the ground, wood, and clothing are all procedurally generated with mix shaders and creative use of noise textures.

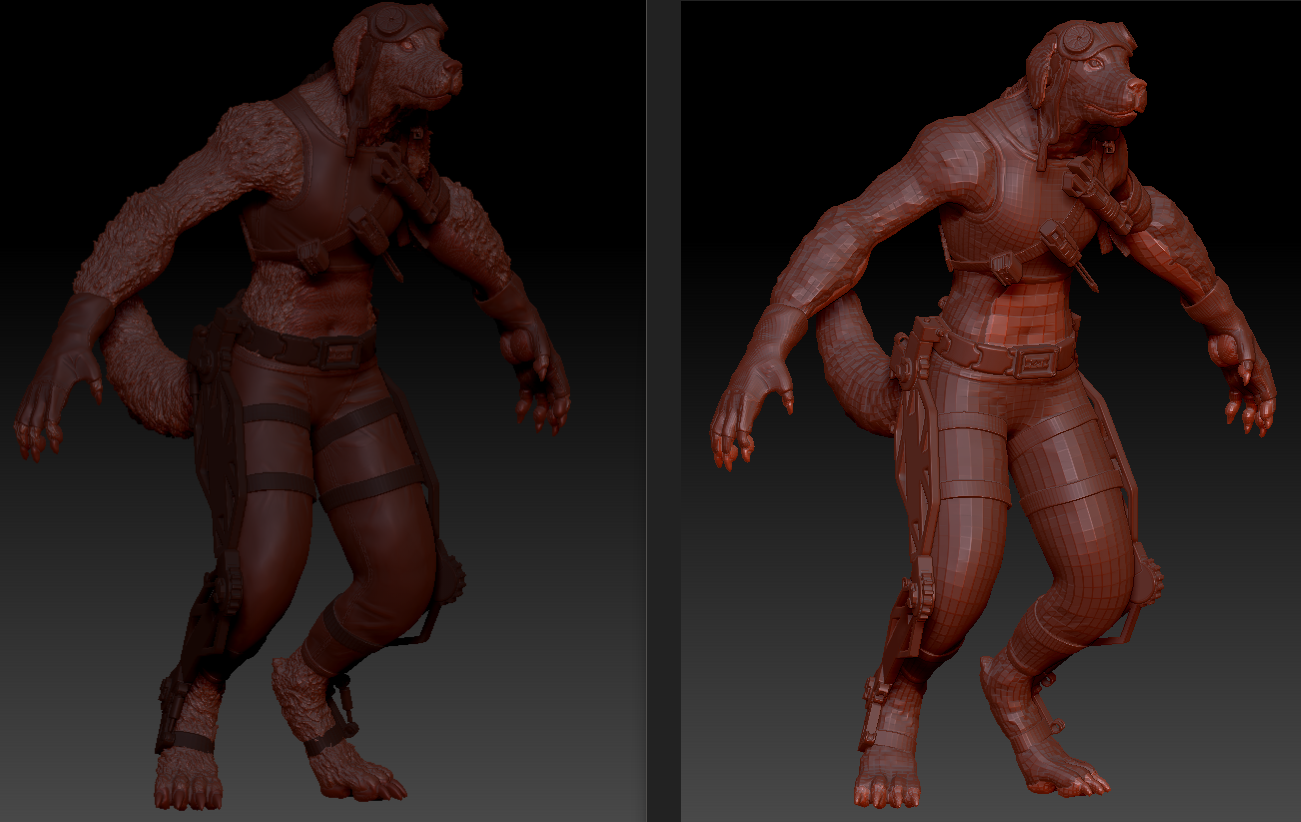
To start, I revisited my old Zbrush project to clean up and optimize the model as much as possible before exporting it to Maya using the “GoZ” features. Fortunately, I had already remeshed the model to be ideal for modeling and animation. The fur was modeled as large masses with finely manipulated geometries, so something different would have to be pursued for the Maya implementation for a better effect. To preserve some details, I baked normals maps before exporting the model.

View my final composited Zbrush shots from Insun Kwon’s class! Zbrush reduction
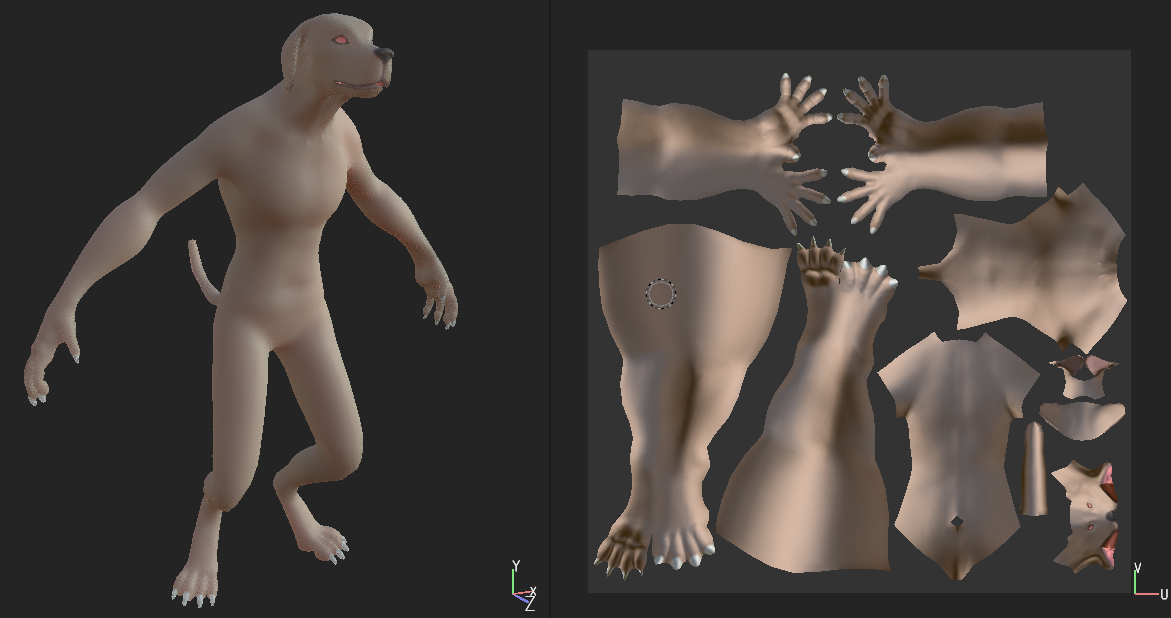
Additionally, I created an improved set of UVs manually through Maya’s UV editor for the main body mesh to allow easier detailing of the skin in Substance Painter. This was primarily done to create some distinction between the finger nails, toe nails, inner mouth bag, eye bags, nose, and hand/foot pads. Here is what the resulting UVs and Substance Painter result look like:

SP and UVs

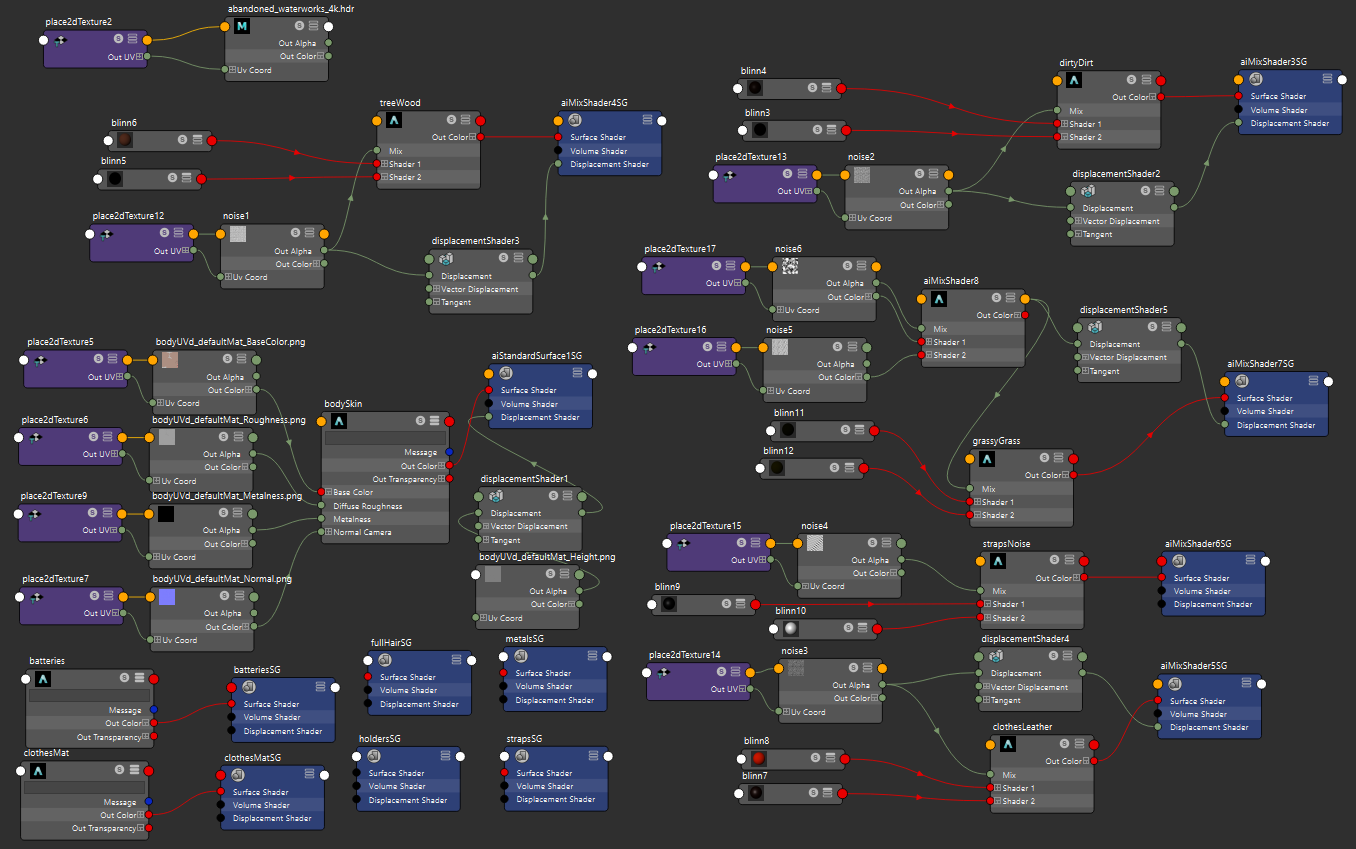
The rest of the items on this model make use of simpler shaders to give the impression of metals, then use some noisy mix shaders for straps or the orange leather. A simple scene was also created using some noisy mix shaders for wood and ground textures. These noisy mixes also make use of some slight displacment to create some more interesting surface irregularities. An HDRI was used for the skybox, which was sourced from the wonderful website: hdrihaven.com/hdris. An overview of the hypershader view can be seen here:

Hypershader

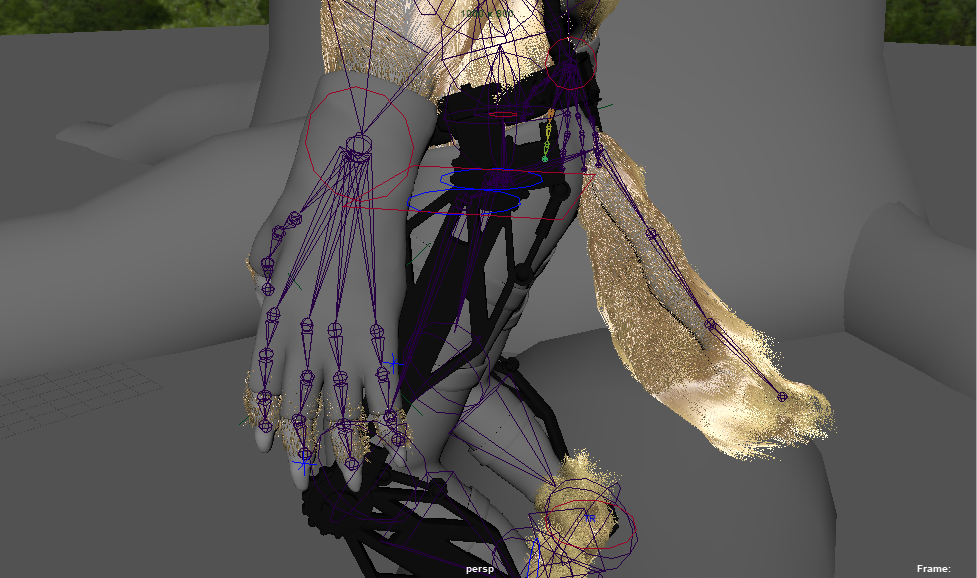
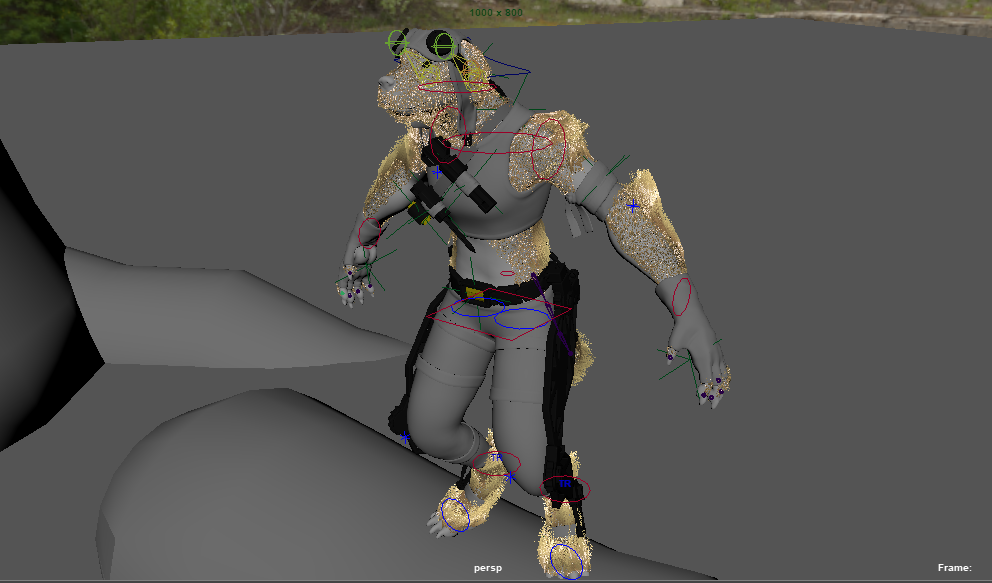
Now the most complex and tedious part can begin: rigging and animating. Fortunately, Maya has a feature to develop a “quick rig” for humanoid character, but this does not include anything for hands or tails. However, the first result of the quick-rig tool is not sufficient and requires use of the step-by-step option to correctly position guides and increse the skinning resolution to work with the fingers correctly. There are numerous tutorials for integrating hand rigs that I was also able to adapt into a method to create a decent tail rig which can move side-to-side (wag) and up-to-down (sag). These are set as driven keys in the hip control, whereas the fingers are driven keys set up in each wrist control. Throughout the animation, you can the characters tail and fingers move with some realism as a result. You can see the hand and tail skeletons here:

hands and tail

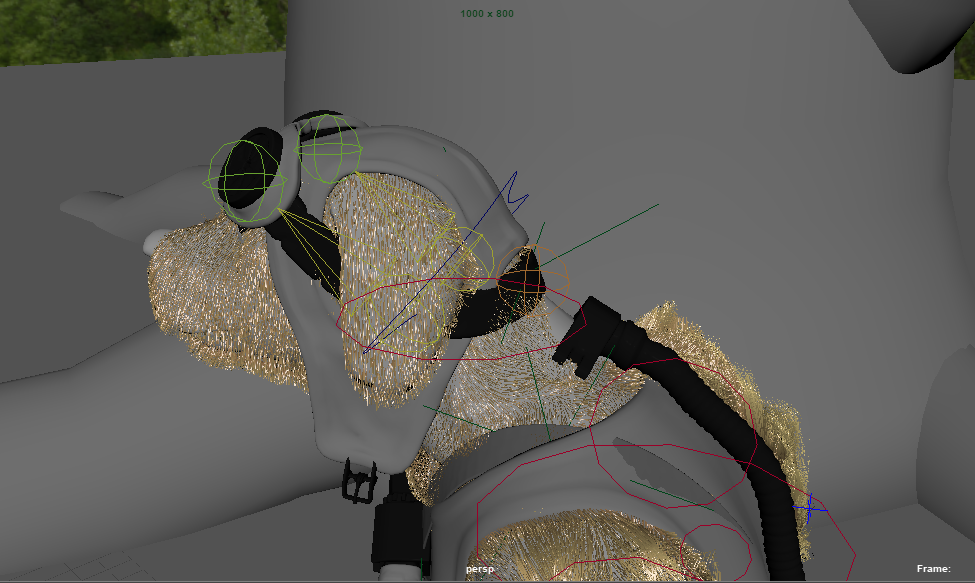
As a fun side task, I made a basic rig for the goggles to allow the character to put them on while keeping the back of the band in place and deforming the model in a way that makes sense. A quick control nurb shape was added to the appropriate joint to more easily manipulate it for this effect. You can see the basic rig and controller here, in adddition to the rivet constraining it to the back of the neck:

goggles

Finally, rivet pins were created at a few locations to keep other parts with the model that aren’t intended to directly deform with the quick-rig skin. Rivets are used in each hand for the variety of tools to be used in them, on the tool strap to hold them when they’re not in use, and for the goggles to keep them in position on the head. To easily implement the method of “picking up” the tools and put them back, duplicates are created that stay at each location and only the “visibility” is keyed as needed. For this to make sense and look believable, it is important that none of the duplicates are visible at the same time. The only duplicate the moves relative to a rivet is the battery that’s ejected from the belt. You can see all the control elements with the green rivet pins for “holding” tools here:

full rig